Cue Decal Recreations

As my interest in antique cue restoration grew, my attention quickly turned to the billiard cue decal. To accurately restore a billiard cue I must also be able to replace a damaged or missing decal. In talking to the experts in the decal screen printing business, I learned that there have been two types of decals used on billiard cues. The first and oldest process is called a varnish-fix decal. As a varnish fix decal is technically as bit more difficult and time consuming to apply a second type of decal gained popularity in the 1940’s. This second type of decal is called a water-mount decal which many people refer to as a “water-slide” decal. Hobbyists who have built a plastic model car from a kit are familiar with the water-slide decals that are included for final decorating.
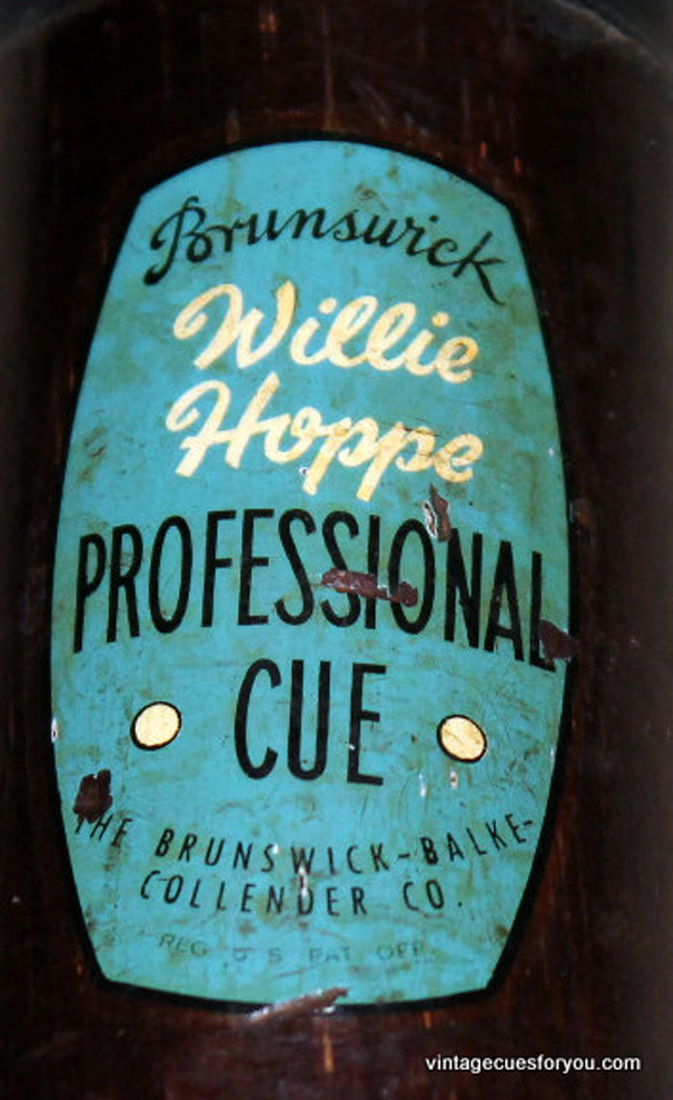
The Brunswick decals were varnish-fix decals up until the Willie Hoppe cue was introduced in the 1940’s with a water-mount decal application process. Older vanish-fix Brunswick decals were quit durable. The decal would wear away from the top down, leaving only a slight impression of where the decal had been. The adhesive on a water-mount decal is dextrose (corn starch). The water-mount decal’s bond to the cue was not great and when the decal is bumped or dented the decal will chip off. The original Willie Hoppe decal shown in Picture #1 is a water-mount decal. It is a great example of how a water-mount decal will chip away if bumped due to the poor adhesion of the dextrose (corn starch) used on these decals. A varnish-fix decal will not chip in this manner as the varnish adhesion is far superior. If an early Brunswick eagle decal appears chipped you will see the underlying wood had chipped out as well. Even though varnish-fix decals are a bit more time consuming in the application process I felt it important to create decals using this old original technology. My feeling is that you should not do a billiard cue restoration, including a decal, if the decal is not correct in design, creation and application.
UNDERSTANDING HOW VARNISH-FIX CUE DECALS ARE MADE AND APPLIED:
Below is a schematic of a varnish-fix decal. A varnish-fix decal is one of the oldest and rarest types of decals available. They are the thinnest, most durable and the most beautiful form of decal available. A varnish-fix decal can be quite detailed, with parts of the decal being separated from the remainder of the decal. For example if you look at the Brunswick eagle in the first white ringed decal the company made, the eagles wings and the banner appear nearly separated from the outer ring. This decal is set on the cue before the stabilizing paper is removed. A water-mount decal on the other hand would have a clear film to hold the print ink in place and you would not see the wood in the openings of the decal.

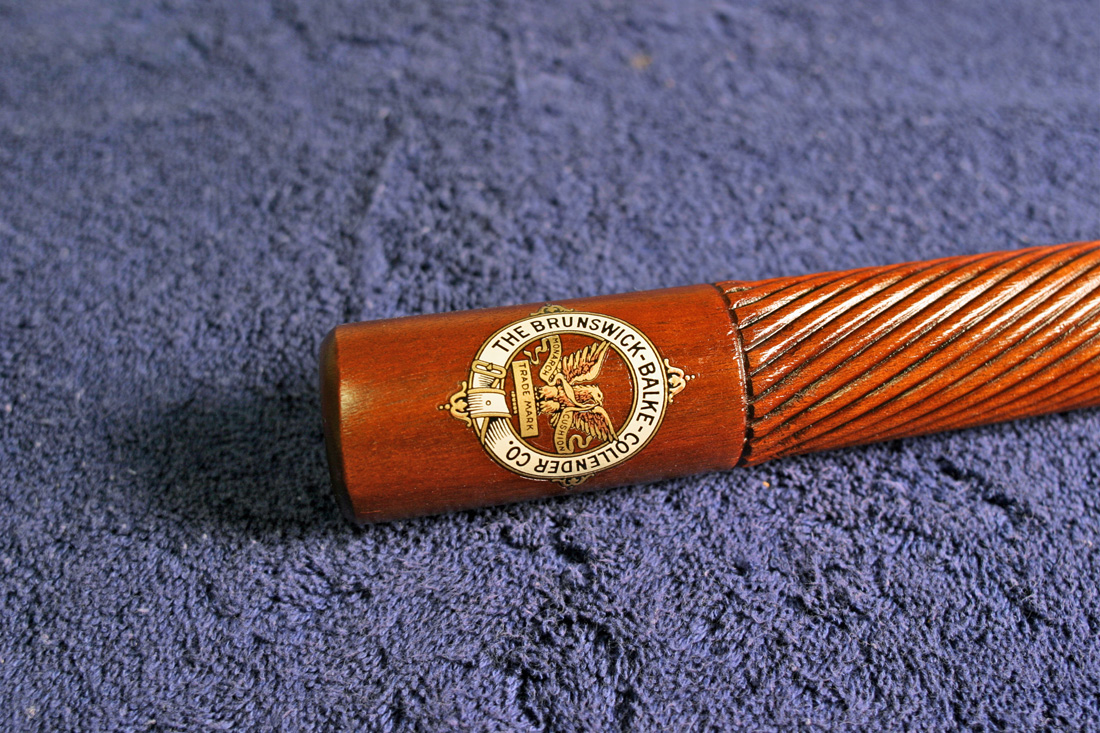
I believe there is only one company remaining in the United States that can create a screen print varnish-fix decal. This type of decal starts with a rare duplex paper that has not been manufactured for 75 years. This paper consists of a stiff white backing paper, a release layer of dextrose and translucent tissue paper. Now comes the interesting and challenging task for the screen print company, the image is screen printed in reverse order. By this I mean the lines or detail that you see first on the decal are first screen printed on the duplex paper. The image is then built up layer on layer with different colors of the image with the last lacquer print layer to be applied being the white back ground as in the example the white eagle in the decal shown at the opening of this page Creating a varnish-fix decal is a very complicated screen printing process which explains why there is only one company remaining in the United States that has the raw materials i.e. the only duplex paper to exist in the world and the creative skill necessary to produce a varnish-fix decal.
There are very few people left in the world who still apply a varnish fix decal as it was done 100 years ago, I being one of them. A restored cue with a varnish-fix decal is correct in every way to the original cue decal that Brunswick applied over 100 years ago. Clearly when you set one of my varnish-fix decals next to a poorly designed water slide decals that others are selling on the market you will see the differences right away. My feeling is if you are going to the trouble of restoring and valuable antique Brunswick-Balke-Collender billiard cue why would you apply a cheep imitation of a decal that degrades the value of the cue.
Applying a varnish fix decal is actually a very simple, strait forward process. (AT THE END OF THIS WEB PAGE YOU WILL FIND A YouTube VIDEO SHOWING THE APPLICATION OF BOTH A VARNISH-FIX AND WATER SLIDE DECAL)
STEPS TO APPLYING A VARNISH-FIX DECAL
- Before a decal is applied the old lacquer applied at the Brunswick factory some 100 years earlier must be removed from the cue and the cue is very lightly sanded. One or two coats of new clear lacquer is applied to the entire butt of the cue and the lacquer is left to dry completely.
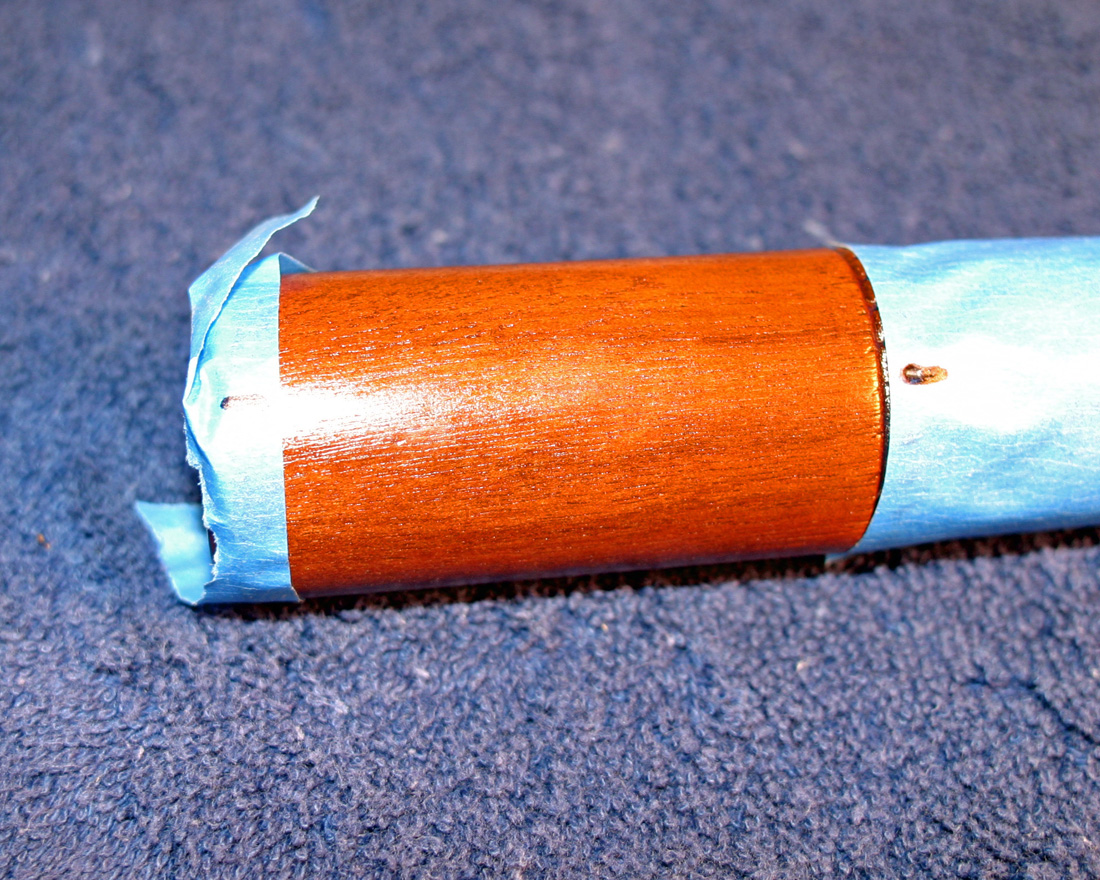
- After the cue has had one or two coats of lacquer and before preparing the decal for application, I put masking tape on the cue and mark the vertical points so that when the decal is set on the cue it is properly centered. As you will see in the video you can also use a straight edge in check to see if the decal is properly centered. See Picture # 2 below.
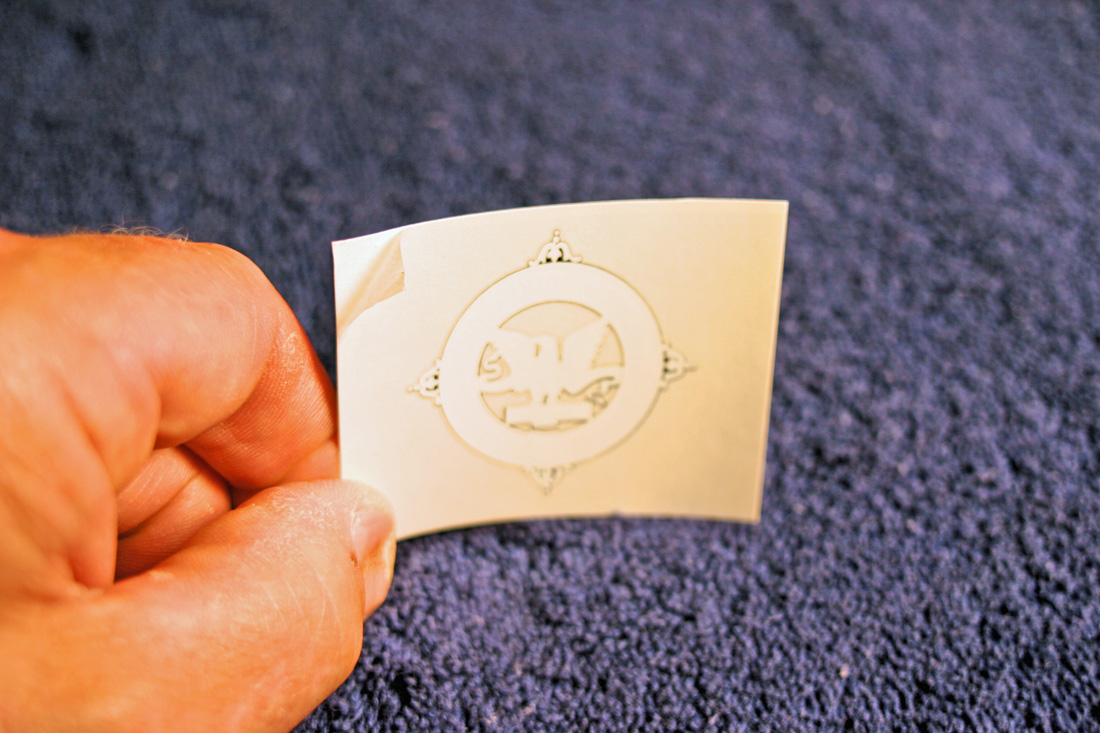
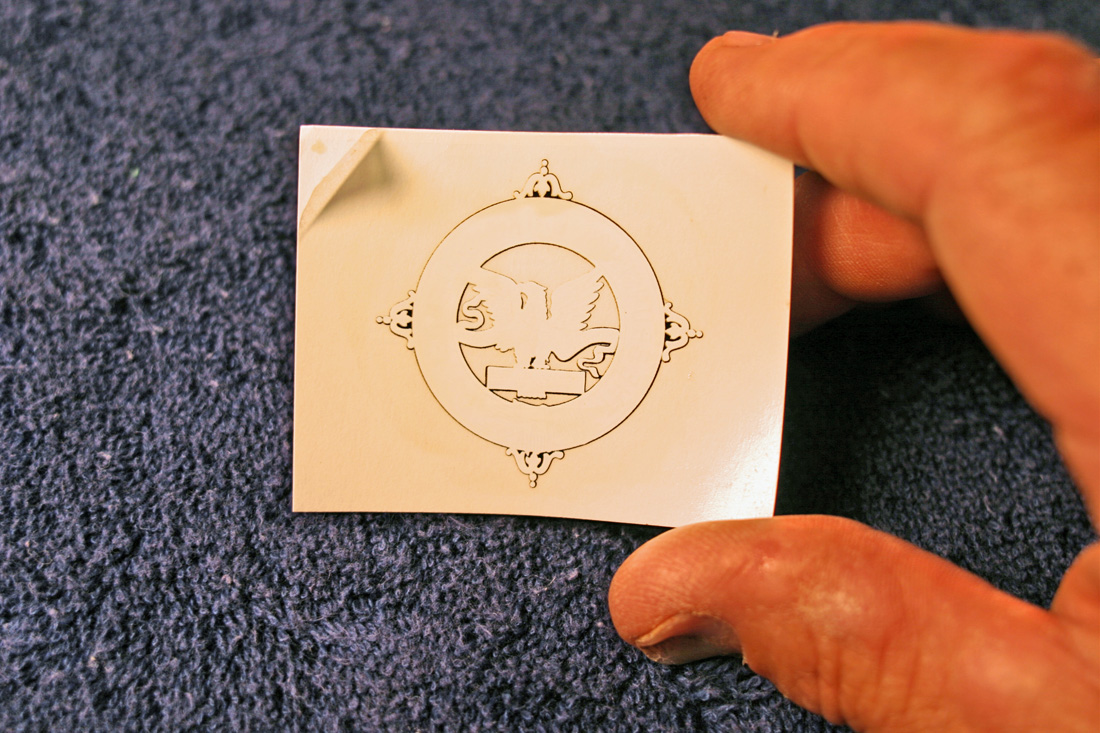
- Picture # 3 shows a varnish-fix decal from the printer. Notice the image you see is the back of the decal which was the last thing printed. I have started to peel the tissue paper from the white backing paper so that I can more easily remove the tissue paper and decal at a later point in time.
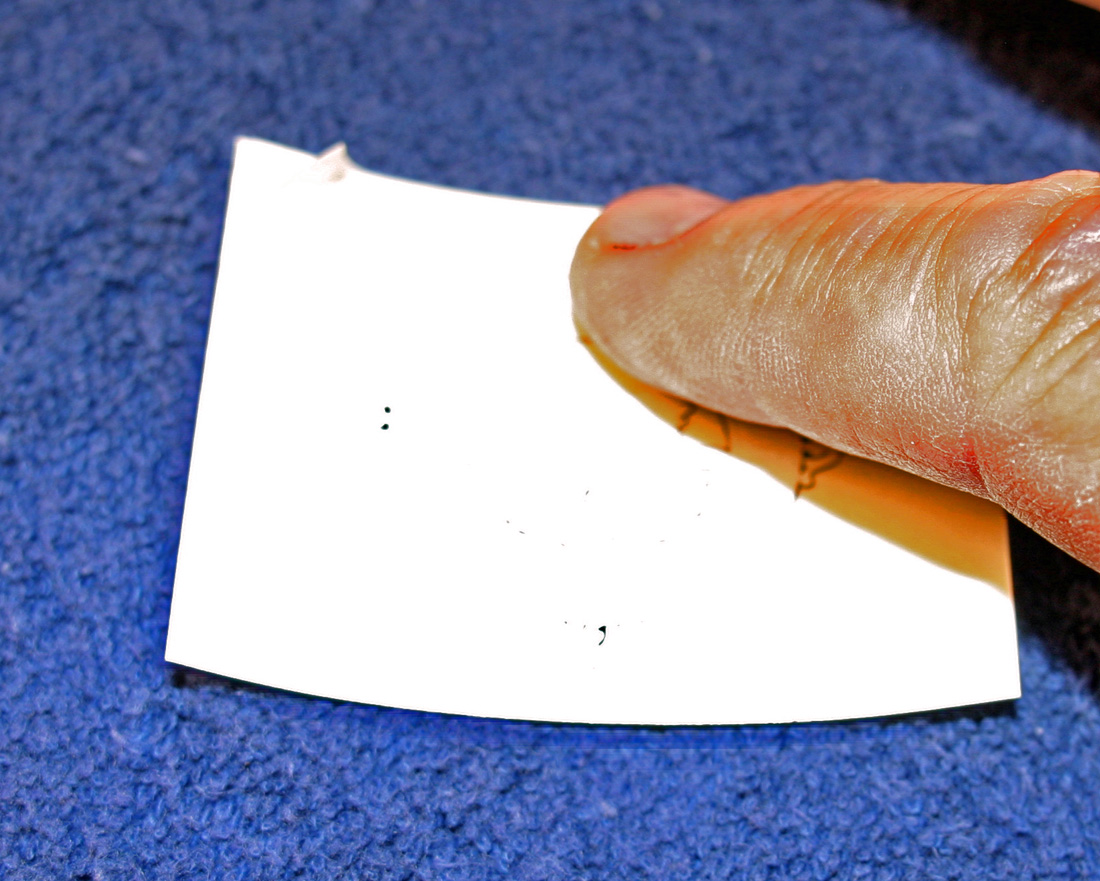
- While it hard to see, I am applying a thin layer of spar urethane varnish to the back of the decal in Picture # 4.
- Once you have applied the spar urethane varnish, I use a dry paper towel to wipe away, as much as possible, the varnish that is beyond the decals image as seen in picture #5. This is important as a clear coat of lacquer over the varnish may cause the lacquer to have an orange peel look.
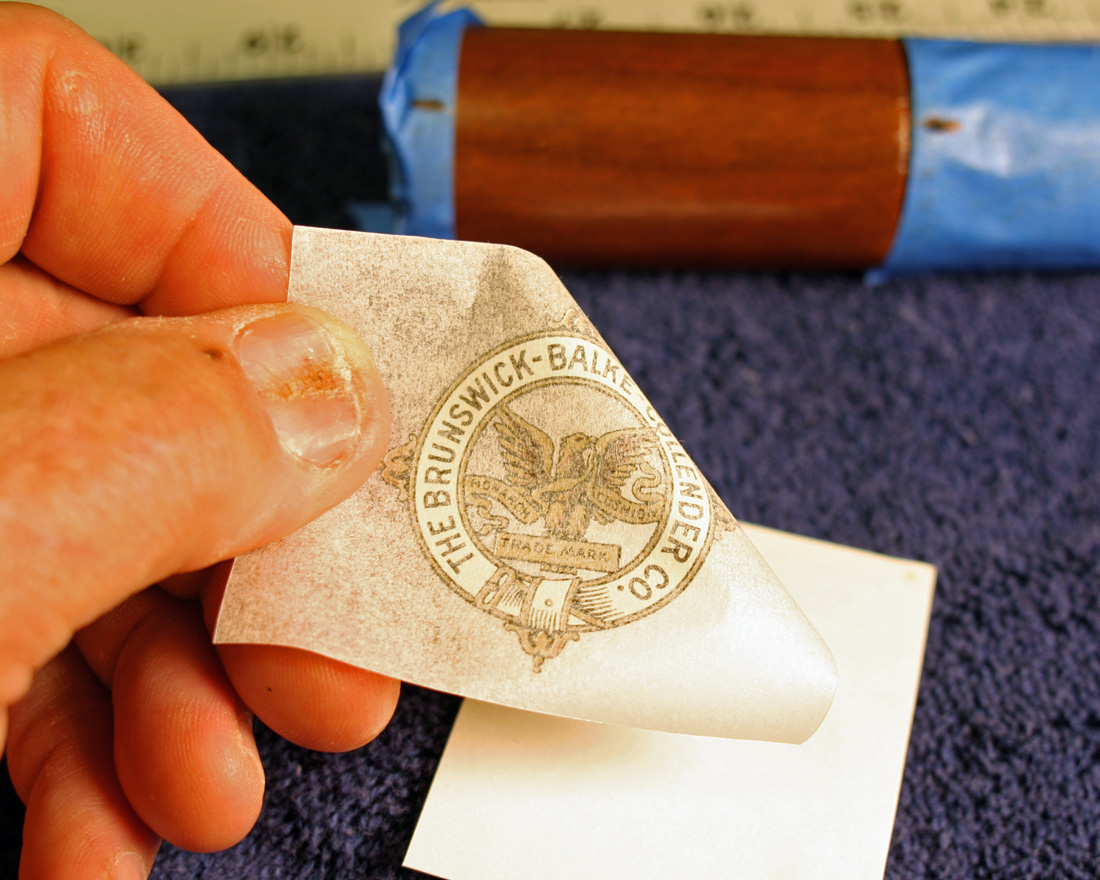
- Peel the decal from the white paper backing stock. When the decal is turned over you can now see the face of the decal in picture #6.
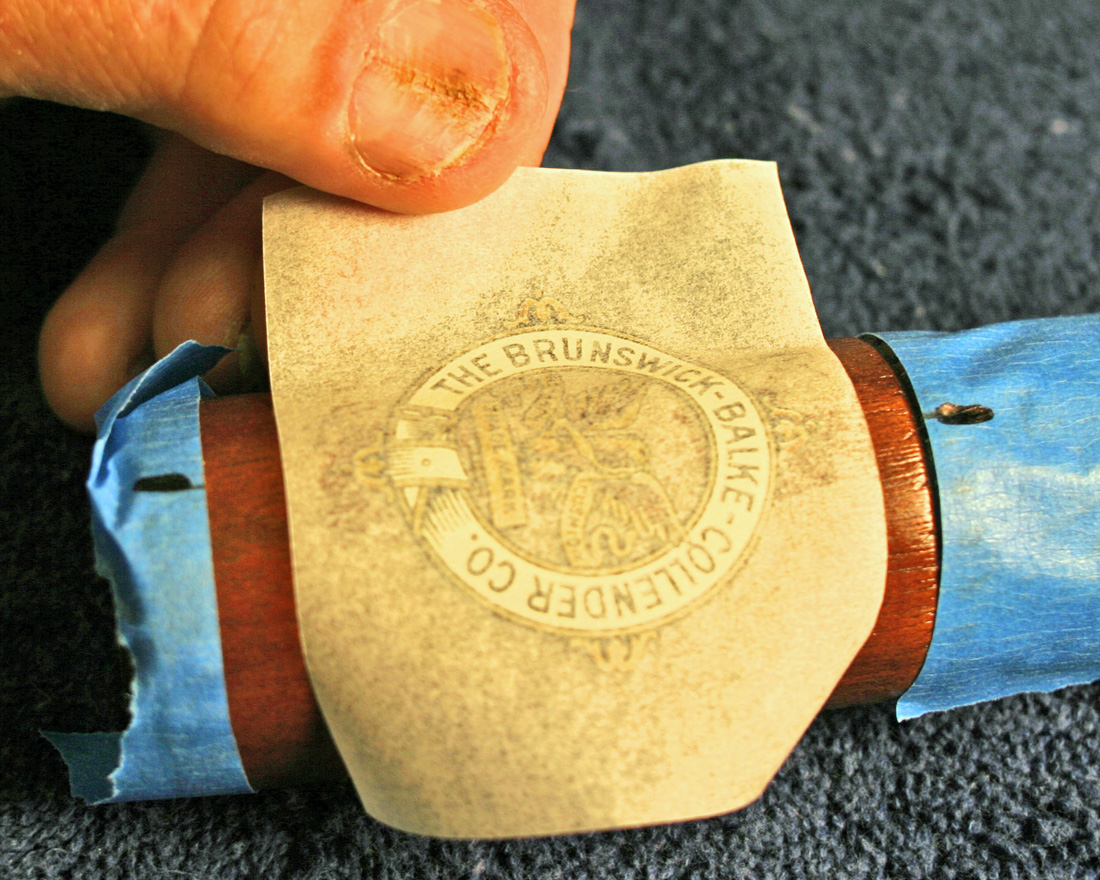
- Center the decal on the cue as shown in Picture #7. Because the varnish is still quite liquid you can gently move the decal if it is not centered but do not try and pick the decal up to move it as you may tear the decal.
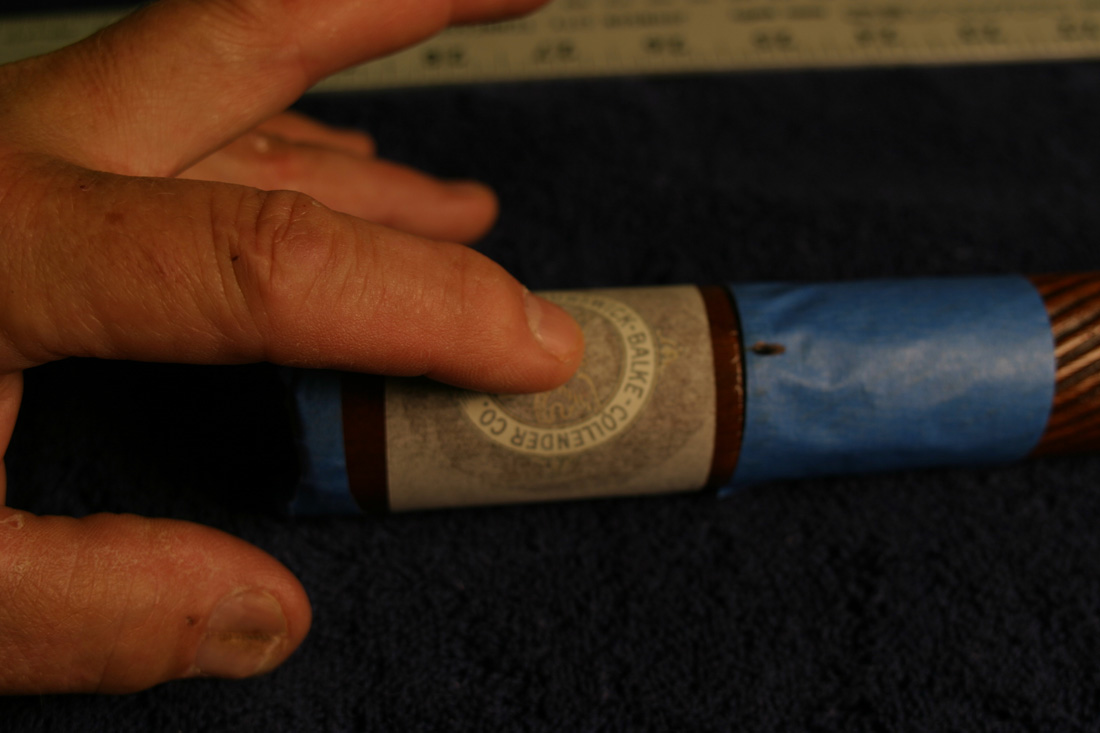
- I lightly rub the decal to insure good contact without moving the decal as shown in picture # 8.
- Once in place use a very wet paper towel and saturate the translucent tissue paper so that it will release from the decal as shown in Picture #9.
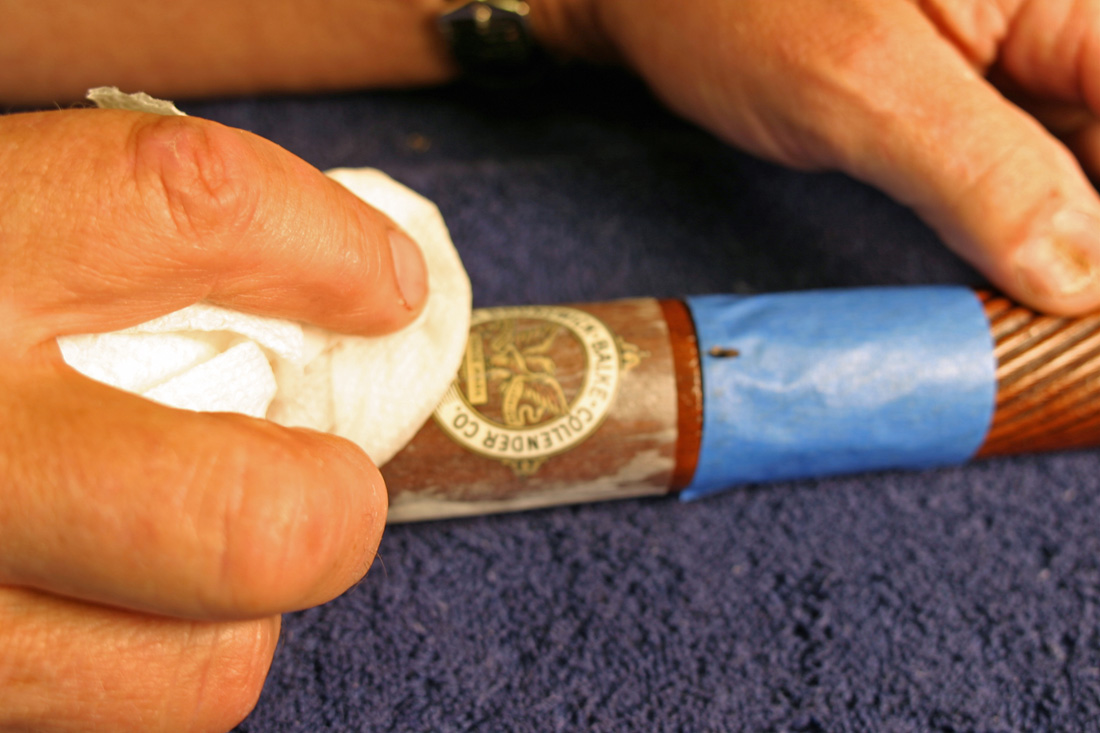
- As you can see in Picture # 10 the tissue paper will lift off of the cue leaving the decal. If as you start to lift the tissue paper the decal start to come with the paper rather than remain on the cue lay the paper back down and further moisten the tissue paper so that it will release.
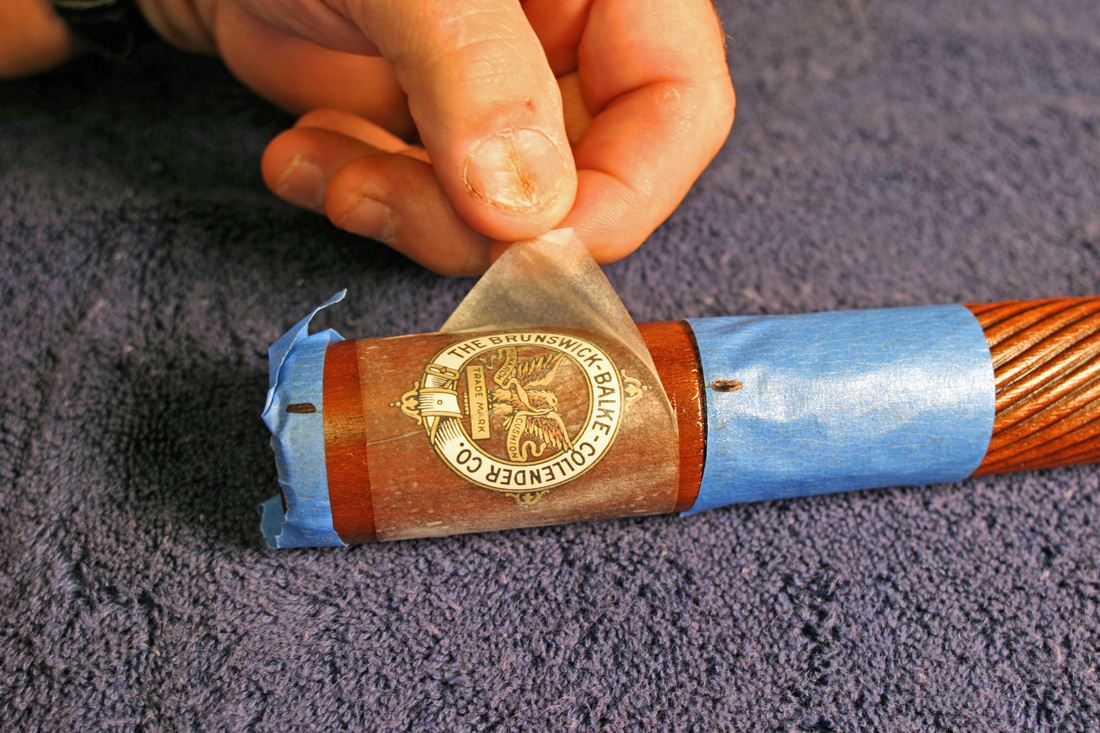
- A wet paper towel is used to insure the decal is in contact with the cue. Because the varnish is still liquid and not compatible with the water, most of the varnish that was beyond the decal or in the open spaces around the eagle can be lightly rubbed away as shown in Picture #11. Look closely at the edge of the decal. If you see any of the varnish continue to wipe it away.
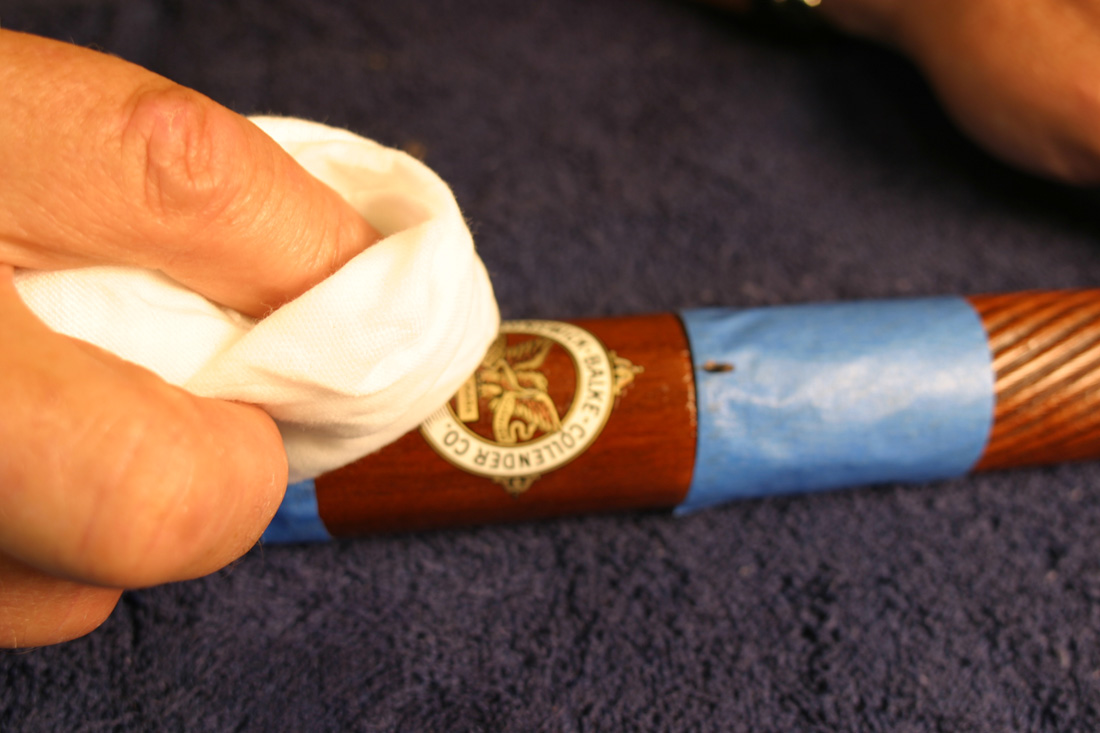
- Set the cue aside for a day or so for the varnish to fully cure. After a day or so inspect the cue again to see if you can see any of the varnish beyond the decal. It is important to remove any remaining spar urethane varnish that was used to adhere the decal to the cue. If this is not done the lacquer finish will not adhere properly to the varnish. Using a paper towel that is dampened with lacquer thinner, I wipe the area of the cue where there may be remains of the varnish. Great care is required to insure the decal itself is not affected. See Picture #12.
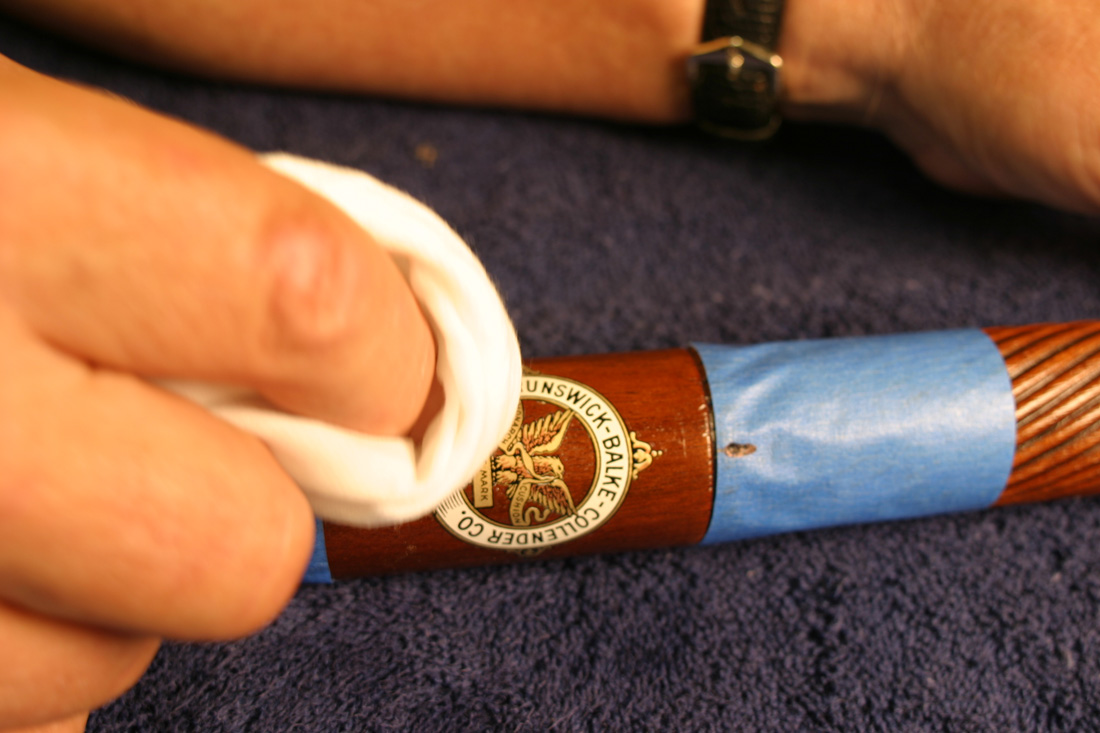
- Finally several coats of clear lacquer are applied to the cue and decal in much the same manner as was done 100 years earlier. As those who use lacquer to finish fine furniture know, lacquer softens the layer below and the two coats become one. The decal itself is pigmented lacquer. Thus it becomes one with the finish above it. That is why an early Brunswick decal looks like it is a part of the finish (see Picture #13). By comparison a water-fix decal like the Willie Hoppe decal Brunswick used in the 1940’s is noticeably raised and is one piece with no cut outs where the wood can be clearly seen.
The varnish-fix decal, that I use when restoring an early Brunswick cue, is costly to create, technically challenging to screen print as well as a bit more time consuming to apply. However, if you have a valuable antique cue, in need of being restored, a varnish-fix decal is the only correct decal and process to use. Please do watch the video of a varnish-fix decal being applied as it gives a better instruction than the pictures above.
(AT THE END OF THIS WEB PAGE YOU WILL FIND A YouTube VIDEO SHOWING THE APPLICATION OF BOTH A VARNISH-FIX AND WATER SLIDE DECAL)
UNDERSTANDING HOW WATER-FIX CUE DECALS ARE MADE AND APPLIED:

Water-fix (water slide) decals replaced varnish-fix decals in the mid-1900’s due to their ease of application. The downside of these decals is the beauty and detail of the earlier decals was lost. These decals look like a printed piece of paper the was adhered to the cue. Brunswick began using water-fix with the introduction of the Willie Hoppe cue in the early 1940’s.
The illustration above shows the layering of a water-fix decal. The screen printing process starts with a backing paper to which a dextrose (corn starch) layer has been applied. Unlike varnish-fix decals the screen printing begins with the printer applying a clear coat to the paper. Then a lacquer pigmented background goes down first. The imaged is then layer up one color at a time. Finally, another clear layer is applied. When you see a water slide decal on a cue you always see the clear halo bordering the decal. The obvious thickness and the halo are the easiest way to distinguish a water-fix decal from a varnish-fix decal. A water slide decal on a Brunswick cue that is earlier than a Willie Hoppe is quite noticeable and in my opinion detracts from the beauty and value of a carefully restored antique cue.
As all modelers know, when a water-fix decal is immersed in water for a short time the dextrose layer is moistened and the decal will slide off of the backing paper onto the cue. The decal can be easily maneuvered into a correct position on the cue. The decal is lightly rubbed with a dry paper towel from the center to the edges of the decal to remove trapped air and seal the decal. Care must be taken to not move the decal during this step. The cue is then left for at least 24 hours and then a clear lacquer is applied to the cue to finish it in the same manner as Brunswick did some 70 years earlier. The cues below are all restored Willie Hoppe Cues with correct decals.

Both varnish-fix and water-fix decals are available for purchase. Go to my For Sale section of this website for decals that are available as well as pricing
Here is a YouTube video showing the application of both varnish-fix and water slide Vintage Cues For You decals for Brunswich cue restoration projects.
